Come Halloween, many of us bust out our art skills (no matter how novice) and try to create our own pumpkin masterpiece. But as you’ve probably learned in the past, carving a pumpkin is not as easy as it looks. Sure, you could go with a no-carve pumpkin or a painted pumpkin, but nothing is more satisfying than a classic jack-o’-lantern.
To help you make the pumpkin of your dreams, we asked experts for their best carving tips that will have your gourds looking and smelling good the entire trick-or-treat season. And it turns out, these pros know quite a few secret tips, like the fact that you should cut the lid from the top and use an ice-cream scooper to remove the guts. Still in need of some inspiration? Take a look at our best pumpkin carving ideas.
1. Start with the right pumpkin.
Choose one that’s fresh, with a sturdy stem, no bruises, and a flat bottom so it won’t roll while you carve.
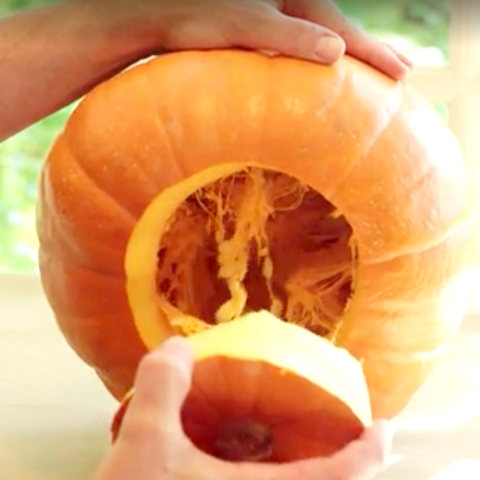
2. Cut from the bottom, not the top.
Michael Natiello, pumpkin carving pro and creative director for The Great Jack-o’-Lantern Blaze, says cutting your “lid” from the bottom of the pumpkin helps prevent the sides from caving in later.
3. If you do carve from the top, cut out the lid on an angle.
This way it won’t drop inside the pumpkin when you put it back on top, like it would with a straight up-and-down cut. A boning knife should work well for this.
4. Scoop out all the pulp (and then some).
You can buy a special “claw” for pumpkin gutting, but an ice cream scoop will do just fine. Thin the inner wall of the “face” area to 1¼-inch thick, so it will be easier to pierce the shell.
5. Sketch out your design on paper first.
If you draw your jack-o’-lantern face to size, Natiello says you can use it as a pattern: Just tape it to the front of your pumpkin and use a fork or pencil to poke holes along the lines you want to carve. (Or save yourself from creative blocks by getting a pumpkin carving kit, complete with a marker, scraper, cutting tools, and pre-made patterns.)
6. Hold the pumpkin in your lap.
It’s easier to create features when the face is gazing up at you. Natiello suggests using a serrated kitchen knife or an X-Acto knife for carving, but to make intricate designs, you could try using a small saw. Just don’t cut on a slant — clean up-and-down slices look best.

7. Start by making simple rough cuts.
If you get the big pieces of pumpkin out of the way first, you can go back and clean up the edges of your design later.
8. Use your scraps creatively.
Make a tongue, pipe, or hair accessories out of a discarded piece of pumpkin shell, for example.

9. Keep your pumpkin fresh.
Natiello recommends spreading petroleum jelly on the cut edges to seal in moisture. If your pumpkin still shrivels a few days later, you can revive it with a facedown soak in cold water for up to eight hours.
10. Create a chimney.
First, leave the lid on for a few minutes while the candle burns. Then make a small hole where the lid has blackened. Or, save yourself the stress and go with battery-operated votives instead.
11. Sprinkle cinnamon inside the lid.
That way, when you light the candle, your jack-o’-lantern will smell like a pumpkin pie. Yum.
Your Pumpkin Carving Toolkit


This content is created and maintained by a third party, and imported onto this page to help users provide their email addresses. You may be able to find more information about this and similar content at piano.io