How to Make 3D Paper Easter Eggs in Six Easy Steps

So many Easter crafts, so little time: There are countless DIYs that put this cheery time of year on full display, everything from woven paper baskets to beautifully dyed Easter eggs. While you can always stick with the classics (traditional dip-and-dye eggs, for example), it’s always fun to try something new, especially when it comes to crafting. If you’re on the hunt for an easy, kid-friendly craft, then you’ve come to the right place: Paper Easter eggs require tons of creativity, but minimal materials and time.
The final product is rather understated, so it’s up to you (and your little helpers) if you want to add different colored paper, hand-painted designs, or other embellishments into the mix. Once your 3D paper eggs are complete, you can use them to fill out floral arrangements or centerpieces, dress up a plain mantel, or hang them on an Easter tree. The decorating options are truly endless!

The Materials You Need for Paper Easter Eggs

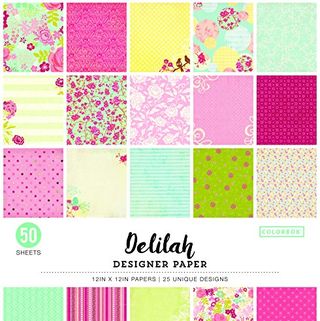
Designer Paper Pad

Colorbok
amazon.com

$5.88

Egg Cookie Cutter

Ann Clark Cookie Cutters
amazon.com

$5.99

Extra Strength Glue Sticks

Elmer’s
amazon.com

$4.29

$3.67 (14% off)

Cotton String

jijAcraft
amazon.com

$8.99

How to Make Paper Easter Eggs

Trace an egg-shaped cookie cutter or stencil on a piece of lightweight paper. Make nine eggs total.
Cut out the egg shapes.
Fold the eggs in half lengthwise.
Put glue on one half of a folded egg and attach it to the half of another paper cutout. Continue until all of the egg shapes are glued together.
To make an ornament, attach a piece of string to the center of the egg and glue the two egg halves shut to secure the string. If you’re not making an ornament, simply glue the two egg halves shut.
Fan out the folds to give it a 3D look.

This content is created and maintained by a third party, and imported onto this page to help users provide their email addresses. You may be able to find more information about this and similar content at piano.io

So many Easter crafts, so little time: There are countless DIYs that put this cheery time of year on full display, everything from woven paper baskets to beautifully dyed Easter eggs. While you can always stick with the classics (traditional dip-and-dye eggs, for example), it’s always fun to try something new, especially when it comes to crafting. If you’re on the hunt for an easy, kid-friendly craft, then you’ve come to the right place: Paper Easter eggs require tons of creativity, but minimal materials and time.

The final product is rather understated, so it’s up to you (and your little helpers) if you want to add different colored paper, hand-painted designs, or other embellishments into the mix. Once your 3D paper eggs are complete, you can use them to fill out floral arrangements or centerpieces, dress up a plain mantel, or hang them on an Easter tree. The decorating options are truly endless!

How to Make Paper Easter Eggs

  1. Trace an egg-shaped cookie cutter or stencil on a piece of lightweight paper. Make nine eggs total.
  2. Cut out the egg shapes.
  3. Fold the eggs in half lengthwise.
  4. Put glue on one half of a folded egg and attach it to the half of another paper cutout. Continue until all of the egg shapes are glued together.
  5. To make an ornament, attach a piece of string to the center of the egg and glue the two egg halves shut to secure the string. If you’re not making an ornament, simply glue the two egg halves shut.
  6. Fan out the folds to give it a 3D look.

    This content is created and maintained by a third party, and imported onto this page to help users provide their email addresses. You may be able to find more information about this and similar content at piano.io

    Leave a Reply

    Your email address will not be published. Required fields are marked *